
A lot of us use BTCPay Server because it lets us accept Bitcoin without a payment company holding the money.
But I am definitely not the only one who has wondered: how do I accept other currencies too, without giving up self-custody?
Bitcoin is great, but not all customers hold Bitcoin. Some want to pay with USDT, USDC, SOL, TRX, DOGE, BCH, ADA, or whatever they already have in their wallet.
This short guide shows how to add multi-currency payments to BTCPay Server, support 90+ coins and chains, and still keep the important parts: no KYC/KYB, no hosted processor balance, and settlement to wallets you control.
Before You Start
You need three things before changing anything:
- admin access to your BTCPay Server instance,
- a BTCPay store where you want to enable multi-currency checkout,
- default settlement chain
- addresses for the chains you plan to support
Do not rush the address step. If you are adding multiple chains, make sure every address belongs to a wallet your team controls. The point of this setup is to keep money out of custodial accounts, so do not paste exchange deposit addresses unless you have a very specific reason to do that.
Also, remember that adding more payment options does not remove your responsibility to test them. Start with a small invoice before using the setup for real customer payments.
Step 1: Open Manage Plugins
From your BTCPay Server dashboard, look at the left sidebar. Under the Plugins section, click Manage Plugins.
This is where BTCPay Server lists installed and available plugins. If your server already has several plugins enabled, you may need to scroll or search.
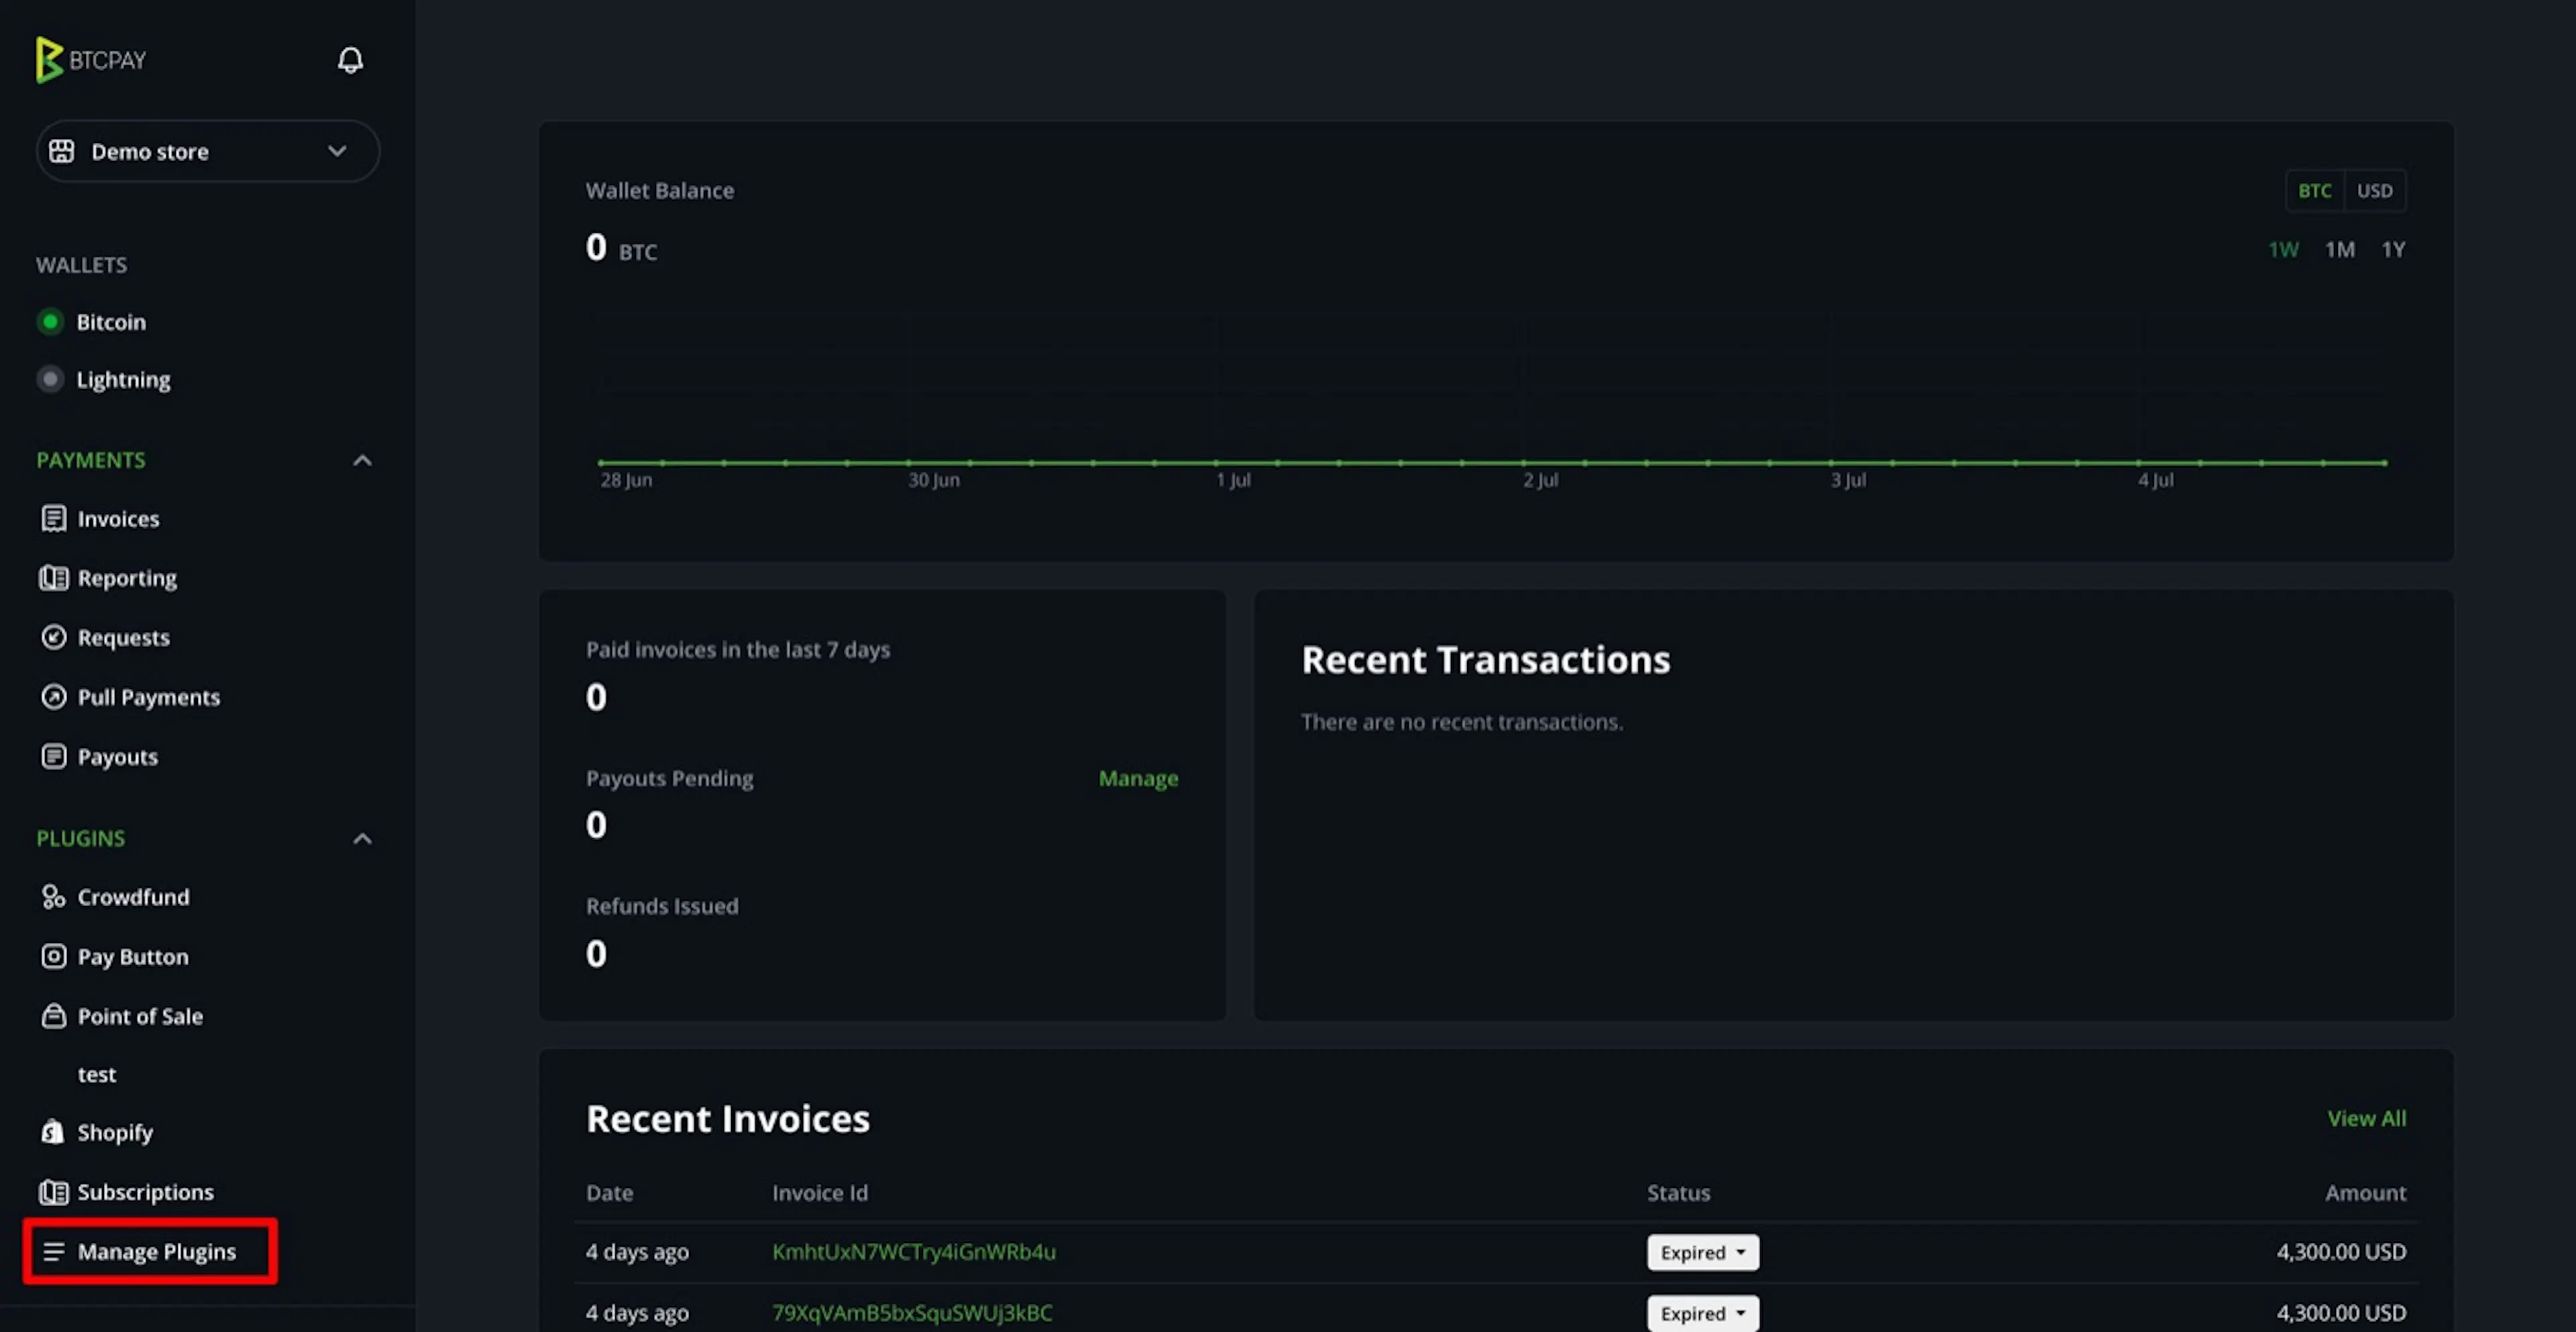 BTCPay Server dashboard showing Manage Plugins in the sidebar
Step 2: Install the Multi-Currency Plugin
On the Installed Plugins page, find the available plugin called Accept more than 90+ coins and chains – MakePay.
The plugin card explains the basic idea: customers pay in their preferred coin, and merchants receive their chosen asset through conversion. Click Install.
After installation, BTCPay Server may ask you to restart or refresh the server depending on your deployment and plugin state. Follow the prompt if it appears. Plugin changes usually need a reload before the new menu items become available in the store sidebar.
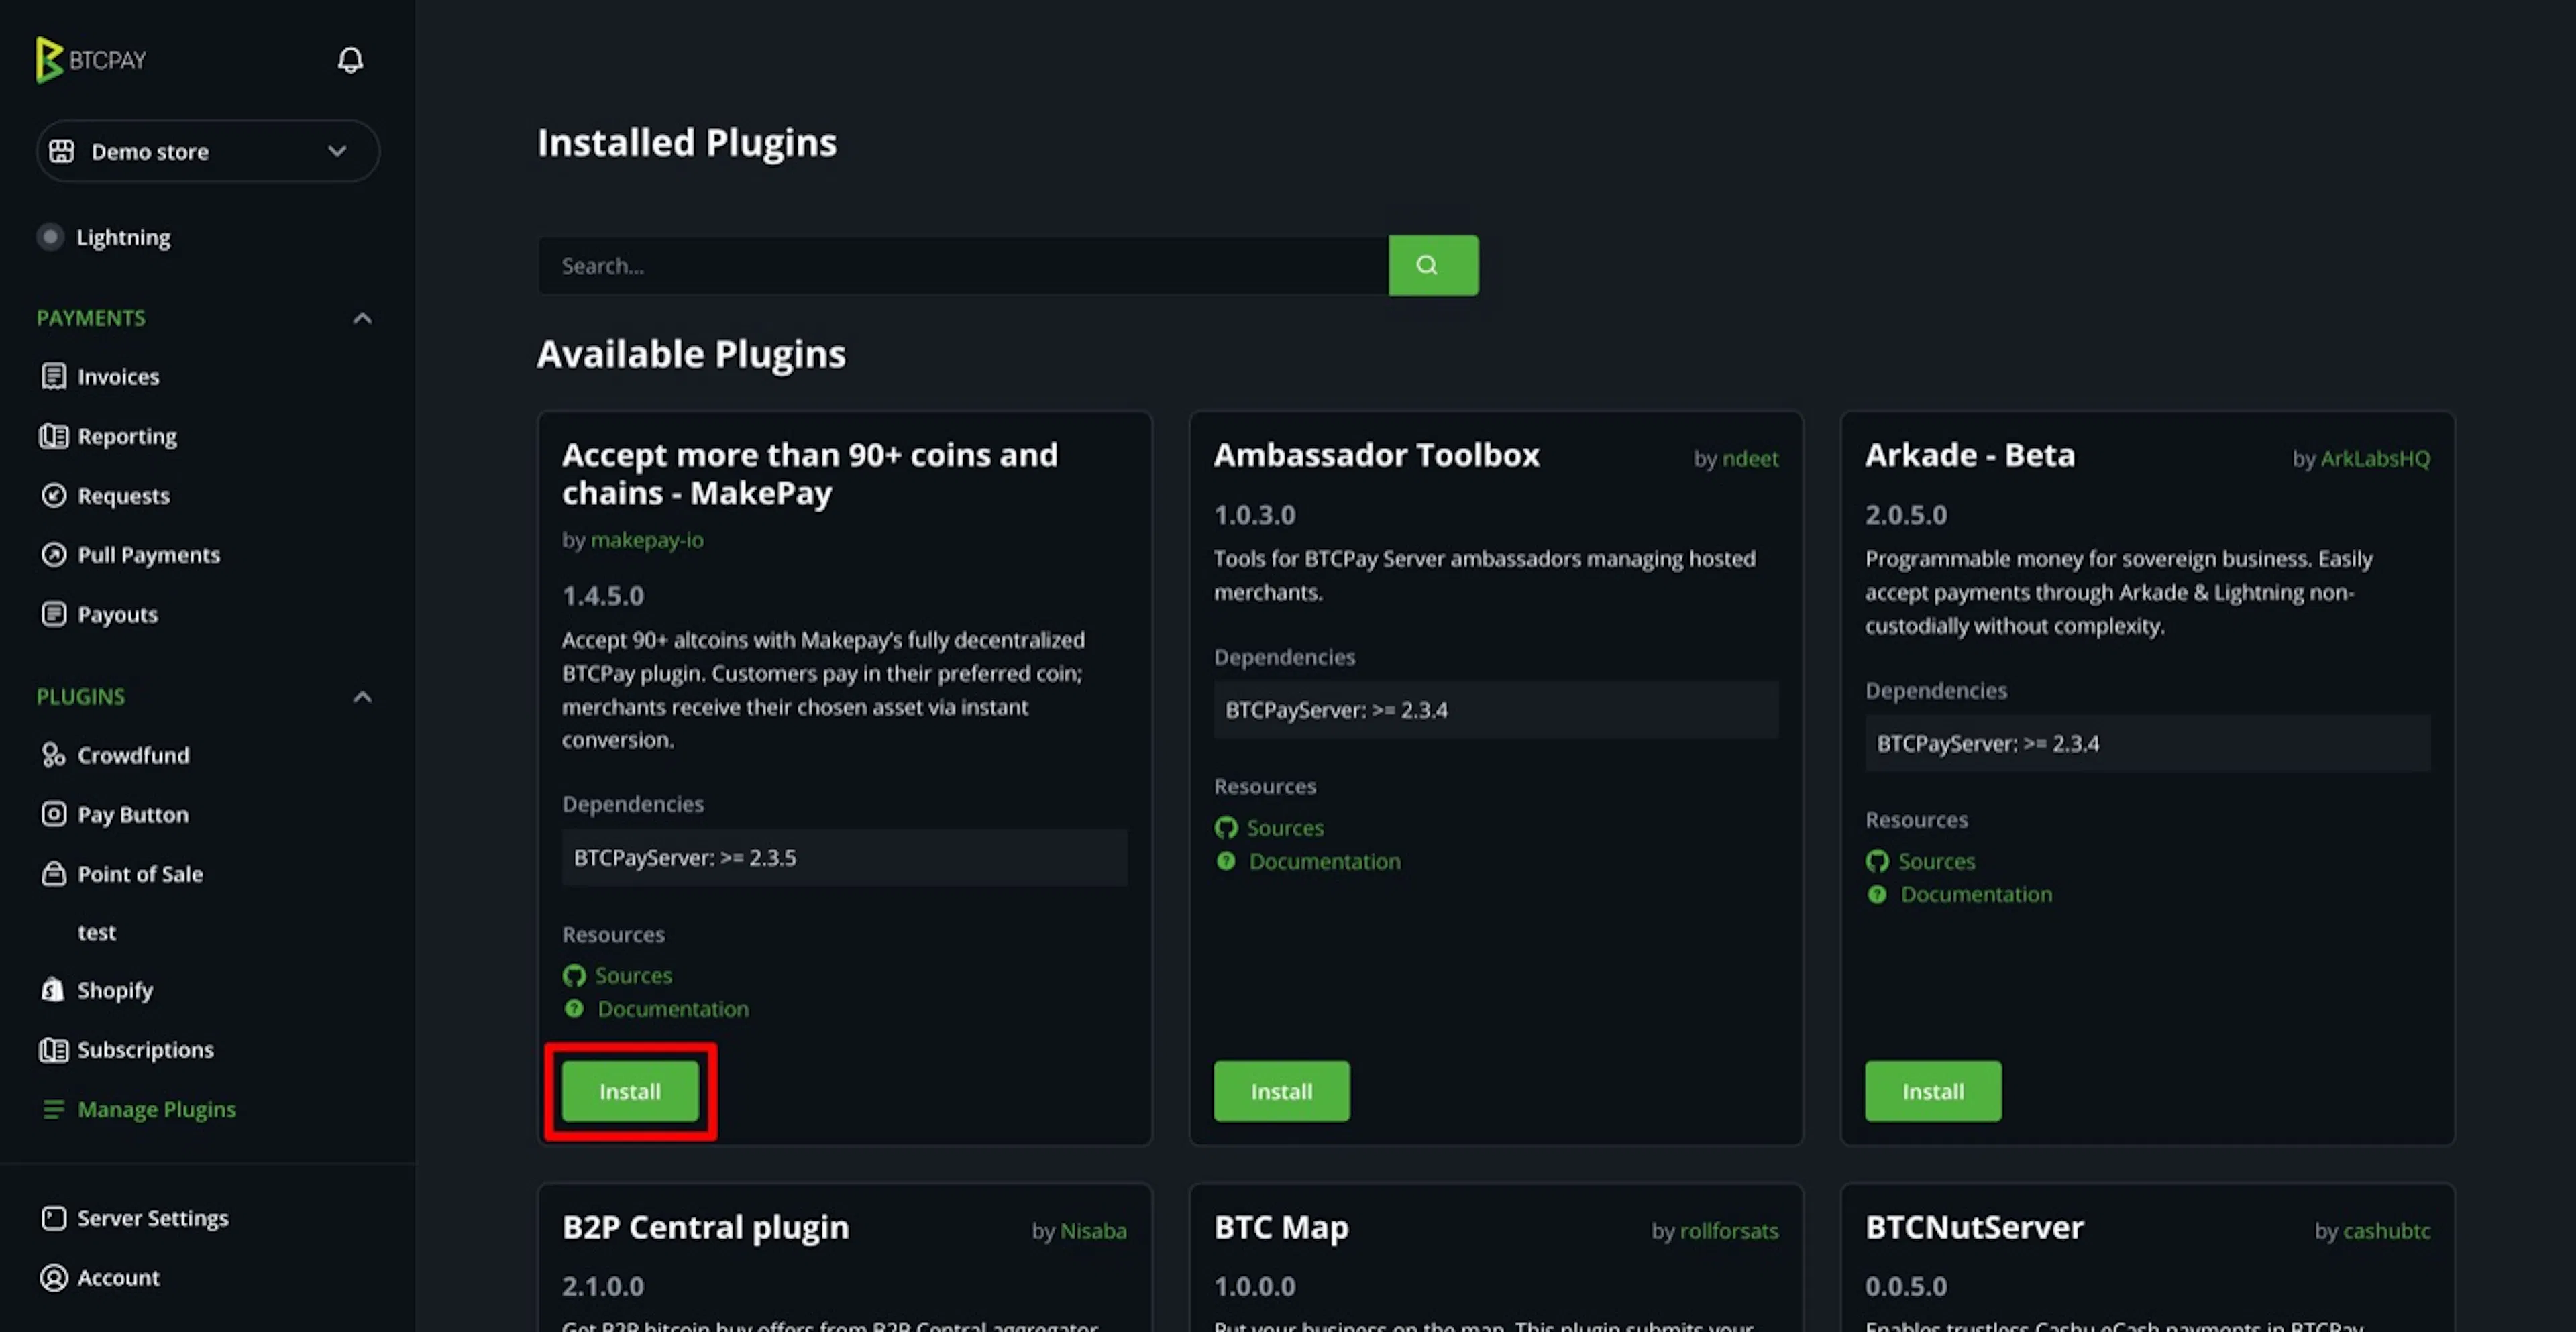 BTCPay Server plugin page showing the multi-currency plugin install button
Step 3: Open the Plugin Settings
After the plugin is installed, a new MakePay section appears in the BTCPay sidebar. Open its settings area.
The important page is the settlement configuration. This is where you define the wallet addresses your team controls for each supported pay-in chain.
You should see a list of chain payment addresses. The interface shows how many chains are supported, how many addresses are already set, and how many are missing.
BTC is marked as required for anonymous settlement. Other chains show address fields such as TRON, ADA, BCH, DASH, DOGE, and more.
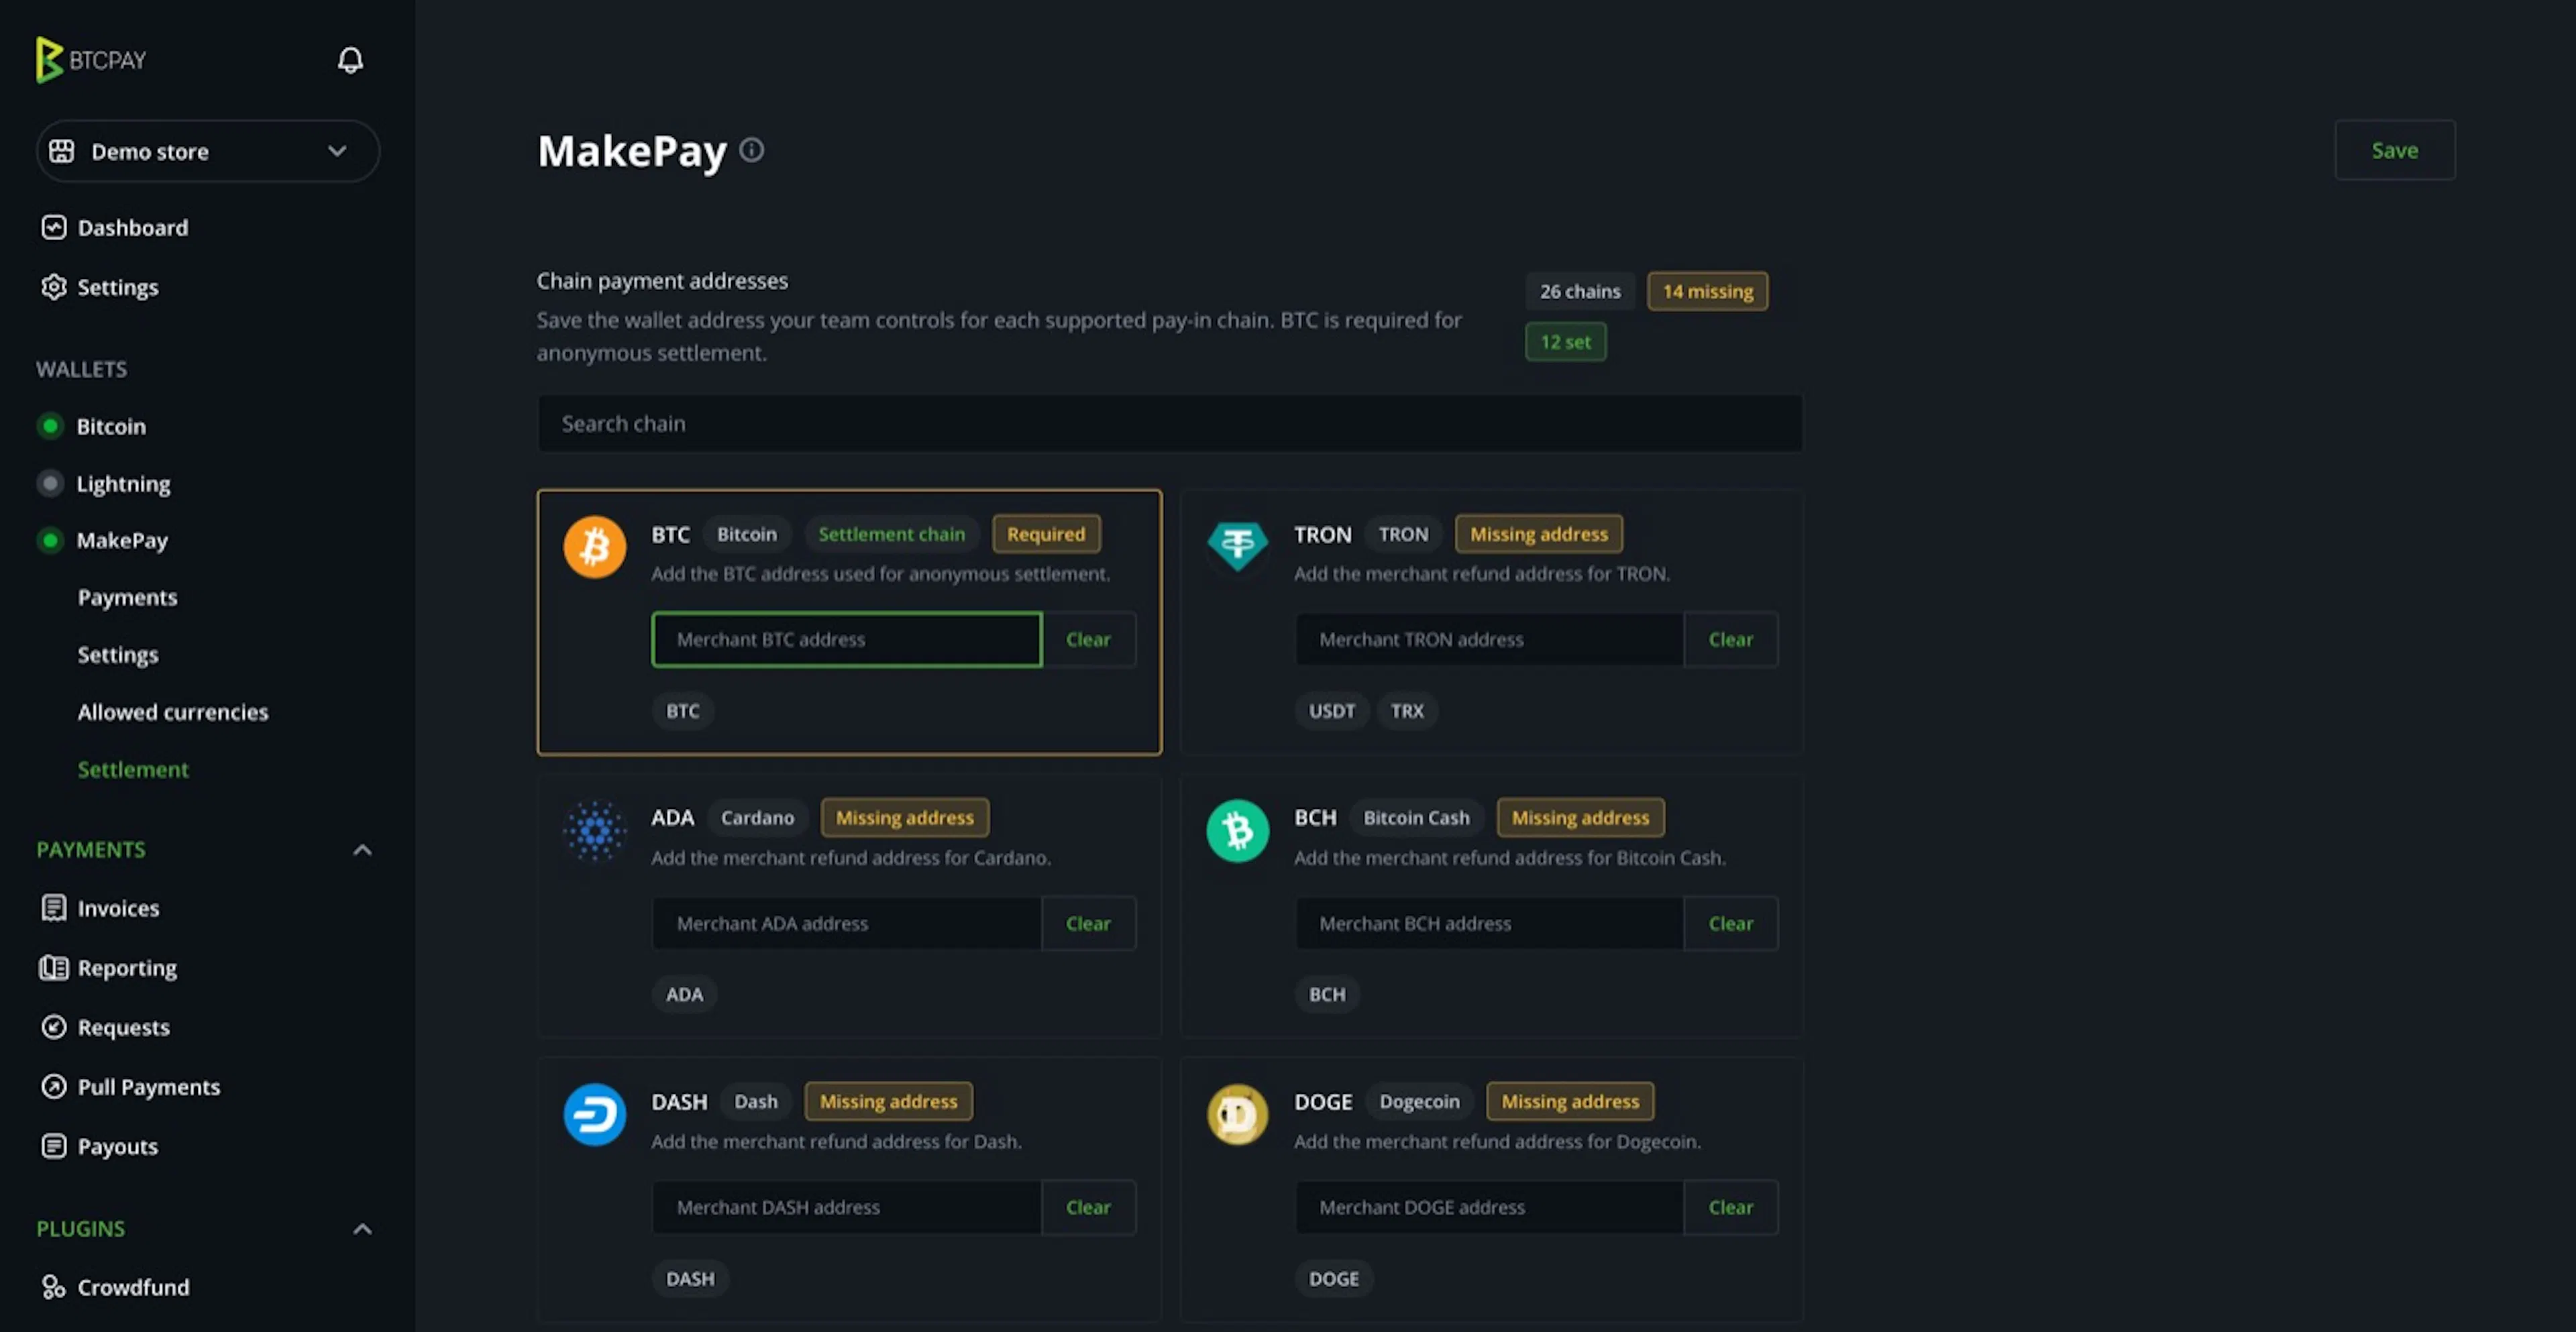 BTCPay Server plugin settings showing chain payment address fields
Step 4: Add Your Chain Payment Addresses
For each chain you want to accept, paste the merchant address for that network.
For example:
- BTC address for Bitcoin settlement,
- TRON address if you want to support TRON assets such as USDT on TRON,
- ADA address for Cardano,
- BCH address for Bitcoin Cash,
- DOGE address for Dogecoin,
- and so on.
Use the correct network for each address. This is the detail that matters most in multi-currency crypto checkout. USDT on TRON is not the same thing as USDT on Ethereum or USDT on another chain. A wrong address or wrong network can turn a normal payment into manual recovery work.
After entering the addresses you need, click Save.
Step 5: Choose the Currencies You Actually Want
More payment options are useful, but you do not need to enable everything just because it exists.
Think like a merchant, not like a coin collector.
Good starting options are usually:
- BTC,
- USDT or USDC on the networks your customers already use,
- one or two popular low-fee chains,
- and any specific assets your customer base commonly requests.
A hosting company, marketplace, crypto service, OTC desk, or digital product seller may benefit from more options. A small local store may prefer a shorter list to reduce support questions.
The best checkout is not the one with the longest token list. It is the one customers can use without asking support what to do next.
Step 6: Test With a Small Invoice
Before announcing the new checkout, create a small test invoice.
Check the full payment flow:
- the invoice opens correctly,
- the new payment options appear,
- the customer can select a currency,
- the quote and address are clear,
- the payment state updates after sending funds,
- the settlement reaches the wallet you control,
- and your BTCPay invoice history matches what happened on-chain.
This test is worth doing even if the setup looks obvious. Payment systems fail in boring places: address mistakes, wrong chain assumptions, expired quotes, underpayments, webhook retries, and accounting mismatches.
It is better to find those problems with a small test payment than with a real customer order.
Why This Keeps the BTCPay Philosophy Intact
The reason many merchants choose BTCPay Server is not only fees. It is control.
A normal custodial crypto processor gives you a hosted balance. The customer pays the processor, the processor credits your account, and later you request a payout or withdrawal. That can be convenient, but it brings back the old question: can I get my money out?
A self-hosted BTCPay setup asks a better question: did the payment settle to the wallet I control?
Multi-currency payments should not force merchants back into custodial platform balances. The useful version of this setup lets the checkout support more customer assets while settlement remains tied to merchant-controlled wallets.
That is the balance worth aiming for:
- more currencies for customers,
- self-custody for merchants,
- no KYC/KYB gate just to start accepting payments,
- no centralized platform balance as the default home for funds,
- and a payment flow that still feels simple enough for normal checkout.
A Few Practical Notes
Keep your BTCPay Server updated. Plugin compatibility depends on server versions, and payment infrastructure is not a place where you want stale software.
Keep a record of which address belongs to which chain. If more than one person manages your store, write this down somewhere internal so support and accounting are not guessing later.
Do not enable chains you cannot support. Every enabled currency is also a possible support question.
Do not treat a testnet-like habit as a mainnet process. Mainnet payments involve real funds, real customer expectations, and real accounting.
Finally, make your checkout language clear. If a customer must pay on a specific chain, say it clearly. If the system supports several chains, let the customer choose without needing to understand the infrastructure behind it.
Final Thought
BTCPay Server made it realistic for merchants to accept Bitcoin without becoming dependent on a payment processor. Multi-currency plugins extend that idea to the wider crypto market.
The best version of this setup does not turn your BTCPay store into a custodial exchange account. It keeps the merchant in control, gives customers more ways to pay, and leaves centralized platforms out of the normal money flow.
Your server. Your addresses. Your settlement.